The planned release date for version 5.8.01 is July 27th, just in time for the release of Windows 10. In addition to support for the new operating system, an extended plug-in interface for the Designer will also be included. This article introduces the Template Manager, which uses the new functionality of the API.
Version 1.1
The Plugin Interface is now available in version 1.1. The API is downwards compatible with the previous version 1.0, but new functions require the conzept 16 Release 5.8 Designer.
- Commands can now also be sent synchronously. The plug-in application waits for the designer’s response and is able to receive return arguments. This is an important prerequisite for information to be retrieved by the designer.
- Character strings and any binary information can be transmitted to and received from the designer. Binary data can be sent Base64-encoded and decoded on receipt. By using the memory object, the size limit of 4KB no longer applies.
Designer in version 5.8.
The Designer implements new plug-in commands and events.
- The plug-in can add menu items in the Designer. For example, the context menu for the selected objects can be expanded to include your own menu items. If the menu item is selected by the user, the plug-in receives a corresponding event.
- The Designer provides plug-in commands for working with selected objects. For example, object information can be queried and objects can be created.
- Forms opened in the Designer can be exported as XML or exported and imported in vectorsoft’s own format (RSC).
- Using storage commands, the plug-in is able to save any data and restore it as required. For example, plug-in settings can be saved permanently on the designer side.
The template manager
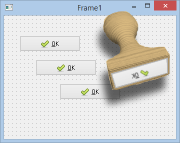
A specific object or group of objects is often used in different places in the application. Be it a button that should have a certain width or height, a company or product logo that is placed in different frames or the entry of a customer number consisting of a label and an edit object. The corresponding objects can be transferred from the existing frames to new frames or containers using ‘Copy & paste’. However, the corresponding frame must first be opened for this. However, as the complexity of the application increases, so does the confusion if the objects to be copied are scattered in different frames.
This is where the template manager comes into play. It can be used to store existing objects that are used repeatedly in a folder structure as a template and restore them at another time.
The plug-in
DThe template manager was implemented as a plug-in application. This means that the new functionality is optional and can be activated if required. However, a developer can also do without the template manager altogether if the functionality is not required.
The application
To use the template manager, the Designer must first be started with plug-in support. The “Plug-ins” menu item is then available in the main menu of the Designer, but is grayed out as no plug-in is connected (Fig. 1).
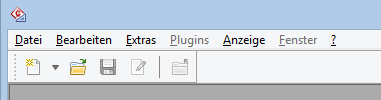 Fig. 1: “Plug-ins” menu item
When the template manager is started, the appearance changes (Fig. 2). The menu also contains the plug-in manager submenu, which can be used to configure the plug-in settings.
 Fig. 2: Connected with template manager
The user interface
The template manager interface consists of a simple window with a tree view, preview area and command line (Fig. 3).
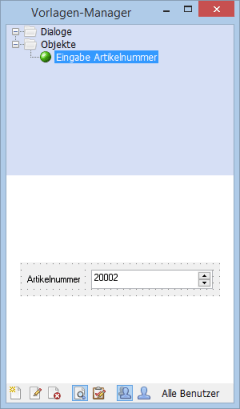 Fig. 3: The GUI of the template manager
Tree view
The tree view contains the existing templates and template folders. There is a view for the templates of all users (global templates) in the database and a view for the user logged into the Designer (personal templates).
Preview
The preview area is located below the tree view. If a template is selected in the tree view, a small preview image of the template is displayed here, which was generated at the time the template was created. This allows you to quickly see which objects the template contains.
Command line
The command line consists of several buttons for the individual functions of the plug-in manager. The buttons (from left to right) are as follows:
- New (Ctrl+N,Enter)
The command line switches to input mode. A template folder is created by entering a name and then clicking on the OK button (tick) or pressing the Enter key. Click on the Cancel button or press the Escape key to return to the command line. If a template folder is selected, another button is displayed (arrow symbol pointing down or right). If this button or the Ctrl+(+) key is pressed, you can specify whether the folder to be created is created on the same level or below the selected folder. - Edit (F2)
The command line switches to edit mode. The selected template folder or the template can be renamed here. - Delete (DEL)
The command line switches to delete mode. Here, the selected template folder (including subfolders/templates) or the selected template can be deleted after confirmation. - Preview
Switches the preview area on or off. - Settings
Displays information and configuration settings. - Templates for all users (global templates)
If this button is selected, the templates of all users in the connected database are displayed. - Templates of the logged-in user (personal templates)
If this button is selected, the templates of the logged-in user of the connected database are displayed.
Working with templates
A template can be created in the Designer by selecting the desired objects and then right-clicking to open the context menu. When the template manager is started, the menu item “Save as template” is located there. If this is selected, the template is saved under the template folder selected in the template manager (Fig. 4).
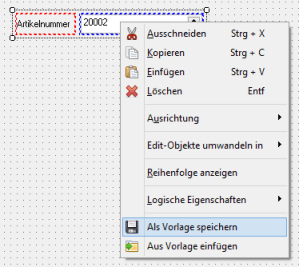 Fig. 4: Creating a template
The template selected in the template manager can be inserted via the “Insert from template” menu item. Alternatively, this can also be done by double-clicking on the selected template in the tree view.
The template manager is included in the CodeLibrary version 5.8.01.